
Create unique trays for your home or gifting following these easier DIY resin tray Projects. These Decorative resin trays are a perfect way to add interest and flair to a room, from woodwork and ceramics to textiles and metal - in a variety of sizes, shapes, and colors - there is no end to the potential of these resin trays, and I hope you'll fall in love with them.
Our given below DIY resin tray projects show you how easy transform simple objects into something beautiful with just a little bit of resin, a few decorations, and some patience. With this easy-to-follow guide to making resin tray projects, you can easily transform mason jars and vases into beautiful, one-of-a-kind glass projects. With step-by-step instructions and colorful photos, you'll easily create lovely liquid mercury trays, chocolate trays, lanterns, and bottles.
DIY Resin Tray Projects

This DIY post contains a list of DIY Resin Tray Projects that are the perfect way to get creative and make something helpful, beautiful, or fun. Each project has clear instructions that are easy to follow, even if you're new to making crafts. These resin tray projects are an excellent way to transform any found material into an art project creatively. Whether you want to make a beautiful centerpiece, display Christmas cards, or use it as an end table and write checks on it, these projects are for you. The best part is, you can make all of these yourself!
Black And White Resin Tray
Create this Black and White Epoxy Resin Tray as a great DIY project. This is a very easy project; all you will need to do is, Using a tree mold, start pouring clear epoxy resin in random patterns and add the cloudy white resin randomly, filling up the spaces and then filling it up with clear epoxy. Add your black and gold resin randomly after heating it carefully using the heat gun. The epoxy resin can be used as an overlay, and you can even use it to create jewelry pieces.
Beautiful Resin Tray Creation
The resin tray is a beautiful way to add a splash of color to your home. It's also great for organizing jewelry, makeup, and other small items. Once you have the Resin Tray, you need heat-resistant resin and opaque black pigment. Pour the black pigment into the tray and let it firm up for 5 to 10 minutes. Then add the white resin over the top and leave it to blend around. Finally, install the handles on either side, and you're done!
White And Gold Resin Tray
This white and gold resin tray is great for serving jewelry, rings, or other special items. The tutorial starts with wiping off the mold and mixing two different Resin colors. Pour these alternating colors into the mold in diagonal rows to create a unique design. Air bubbles are popped out with a torch gun that allows you to pour just the right amount of Resin into each space to ensure that no parts are left over.
Make A Resin Tray At Home
If you love to create your own custom DIYs, this resin tray is a great project for you to try. It's a simple project that can be made with items that you probably already have at home lying around. This easy DIY is perfect for beginners and is ready to use in a few minutes! Learn how to make a resin tray for your next celebration with this quick and easy DIY. Once you've finished the project, it's a great idea to add some sparkle by adding crushed sequins, glitter, or metallic flakes before pouring the resin. Add decorative paper and ribbons for a beautiful finish.
Resin Butterfly Tray Creation

Create a stunning piece of DIY craft art with this unique and beautiful resin butterfly tray! This DIY guide includes all the information you need to make your one-of-a-kind decor piece. Adhere your butterfly images to the tray and decoupage over them with our pre-painted Americana decoupage in gloss. Add more butterflies or other decorative elements, and voila - you’re done!
Blush And Rose Gold Resin Tray

Brighten up your rose gold and blush vanity with this definitive DIY project. This rose gold and blush resin tray is so stunning that we want to share it with you. It's easy to make and will look great on your vanity or coffee table. This DIY project takes just a few minutes and the materials used are safe. The finishing touches are what take the project to the next level! Follow our guide to create your amazing rose gold and blush tray.
Resin And Wood Tray DIY
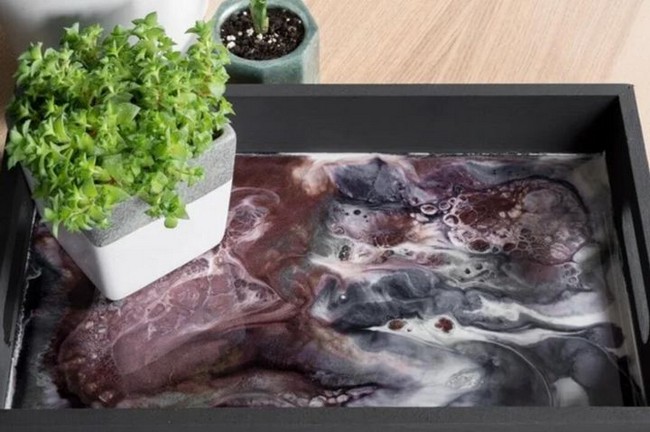
Make beautiful wooden resin trays you can use daily. This project is easy and takes very little time. You need a boxwood tray, high-quality two-part resin, and a few other supplies. It's like icing on the cake when you add flair to this DIY. First up, paint your wooden trays if they're not yet. Then mix up the resin and pour it into the tray to create unique patterns with the heat gun(easy peasy).
Making A Resin Tray

The first step is to mix the resin and divide it into individual cups for each color you want to use. Once all the resin has been divided, pour the hot-colored resin into the tray while moving around it in a circle to cover most of the tray. Once you have finished pouring your resin into the mold and allowed it to sit for a minute or two, place a bubble popping tool under it and move it back and forth until all bubbles pop up through the top layer of plastic. Let it place for another 30 minutes until it's completely dry before taking it out of the mold.
Make A Custom Resin Tray
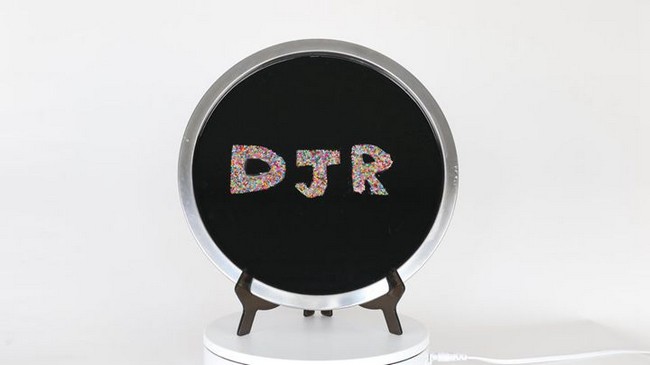
A custom Resin Tray is an awesome gift for any occasion. It can be for Christmas, Thanksgiving, Hanukah, or Mother's Day. Customizing a Resin Tray is quite easy; you use the provided template and photo and add some paint and glue to create your own personalized resin tray. Don't worry; it's not as hard as it sounds; our tutorial below shows you how to make a custom resin tray using the provided template by tracing using a permanent marker, paint, and glue.
Decorative Wooden Resin Tray Design
The decorative wooden resin tray is a great tool for making beautiful jewelry. This can also mix and create new colors, pour into molds, or be used as a decoration piece. A scale is needed for measurements, and then colorants of black, pink, blue, and gold are added to the Resin cups. After leveling everything out so that it doesn't bubble up while baking, a heat gun is used to pop bubbles, creating some effect, or you can heat the surface before pouring in Resin.
Wooden Tray Resin Pour
This DIY wooden tray resin is a super easy and fun project to create something beautiful for your home. Start by weighing and mixing the epoxy, dividing the epoxy into three containers, and adding black alcohol dye, silver alcohol dye, and bronze mica. The next step is pouring a little of the Black Resin to make a base. Then pour the 3 cups of Resin into one cup on the plate in random order. Use a heat gun to pop some bubbles up then you're done!
Epoxy Resin Tray Tutorial
For this incredible project, you need resin, silicone Mold, liquid + mica pigment, gold leaf + glitter, mixing containers, a heat gun, blow torch, handle and enamel paint. Mix resin in different color combinations and fill the mold with clear resin. Then add a bit of extra color to each side and allow to cure. The finishing touches include painting the handle and gluing on some jewels. This is a DIY project that will turn heads!
How To Make Free Form Resin Tray
A resin tray is a great project to do alone or with friends. Once your tray is finished, it will be something you can put on display or use at home. You can also make other designs using the same process to create vases, bowls, and more. The first thing you need to do is mix the resin and the pigment. This is important because it will provide an interesting design for the tray. Apply gold leaf to the edges of your tray with a brush, and then add pigments using the airbrush tool.
Photo Resin Tray Plan
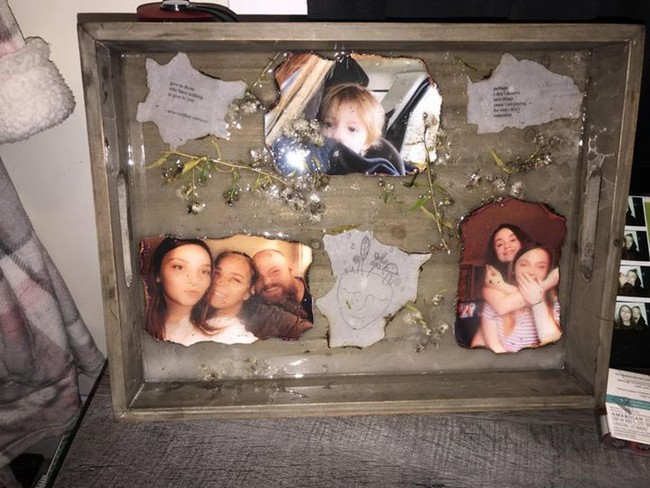
With this DIY Photo Resin Tray Project, you can make an inexpensive and beautiful resin tray using your favorite family photos. This simple project is great for beginners and advanced makers alike. Learn how to make your custom resin tray using your family photos. The materials are included in the guide, and all that's left for you is to add resin, mix, paint the wooden tray, and display it! You can also get creative with your project's look by choosing your colors and how you want the resin to drip down.
Epoxy Resin Wooden Tray Plan
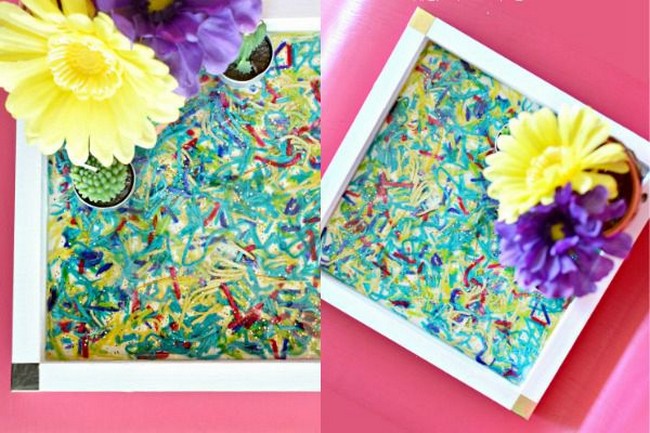
This tutorial will share how to make a beautiful DIY Epoxy Resin Wooden Tray. You must have already known that yarns can do an awesome DIY project for you. It is also an amazing way of recycling your old clothes and embellishing them, giving them a new look after all these years. The process is simple, and the materials are easily available at home. That may be why it is considered one of the popular home decor ideas these days. However, we will discuss another interesting thing: using epoxy resin on beads and yarns. Have you ever thought such two materials could create a lovely product like this? Click on the link below as we show you how it is done!
Resin Ocean Serving Tray
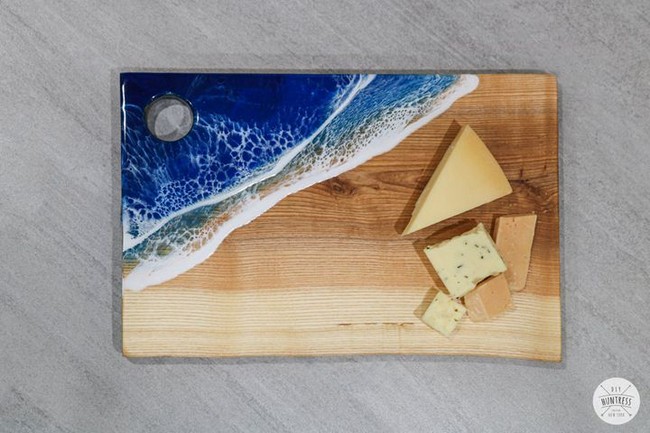
This DIY ocean serving tray can be a wonderful addition to your table. To start, you need to prepare your board and make holes for the handles. Then use different color variations of the resin to create the ocean effect and make waves through the tray using clear resin. The step-by-step instructions and photographs will help you get the desired results. A very creative and easy project for kids! Perfect for parties & special occasions!
Pearl White Resin Tray DIY
Our Pearl White Resin Tray is the perfect gift for any occasion. Create your custom resin tray with a variety of decorating techniques. Mix clear Resin, pearl white, and gold flake, pour into individual compartments, create striking handles, and allow to cure. Once the resin has cured, you can use it to hold small items or display decorative items. The versatility of this pearl tray makes it a versatile and personal gift for anyone on your list.
Resin Serving Tray Project
If you have a dinner party coming up or want to impress your family at home with a beautiful tray, this is the perfect project for you. In this guide, we will use marble squares, Resin, and wood to make a beautiful Serving Tray with gold handles and an elegant design. Whether you want to place it as a coffee table piece or as a decorative item in your living room or dining room, this Resin Tray will look amazing in any space!
Resin Casting Tutorial
Create a beautiful, professional resin cast with this resin casting tutorial. You can even use large jewelry pieces to cast and make your jewelry! Learn how to create molds, pour your resin, use dried flowers in your cast, and add glitter and handles. This tutorial will walk you through the steps to make beautiful resin creations that are easy, fun, and can be reused over and over again. Your finished pieces will amaze everyone who sees them!
Bottle Cap Resin Tray
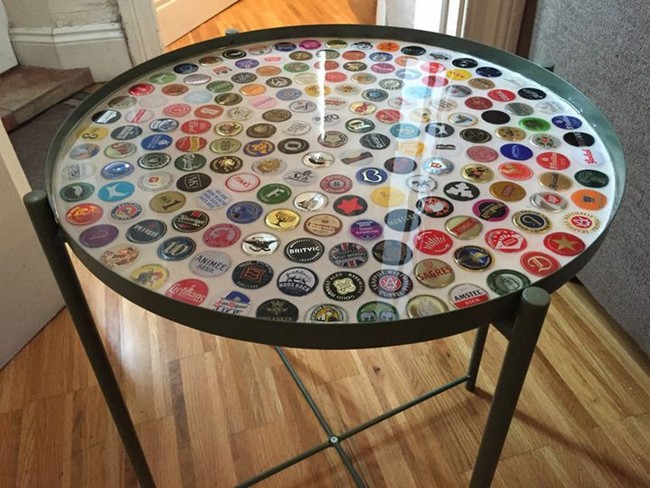
Create your own set of exclusive Bottle Cap Resin Tray as a fantastic way to display your favorite memories. These are the perfect gift for family, friends, and yourself! The DIY Bottle Cap Resin Tray is easy to make and comes with easy-to-understand instructions and all materials needed to create this beautiful piece of art. This project is a fun and simple way to create a beautiful custom table decoration with your creations. It is durable, easy to clean, provides added storage, and looks great in any room!
Happy New Year Resin Tray Idea

This amazing Happy New Year resin tray is the perfect accessory for your home. Add squirts of black paint and mix it thoroughly, then add glitter to your black Resin and pour it into the tray; allow to cure for 24 hrs, then pop on your New Year Sticker and press firmly. Pour a final clear Resin, pop the bubbles and allow it to cure for another 24 hours. The last thing you will need is another boring old paperweight when you can have this awesome new year version instead!
Ocean Mirror Tray Plan
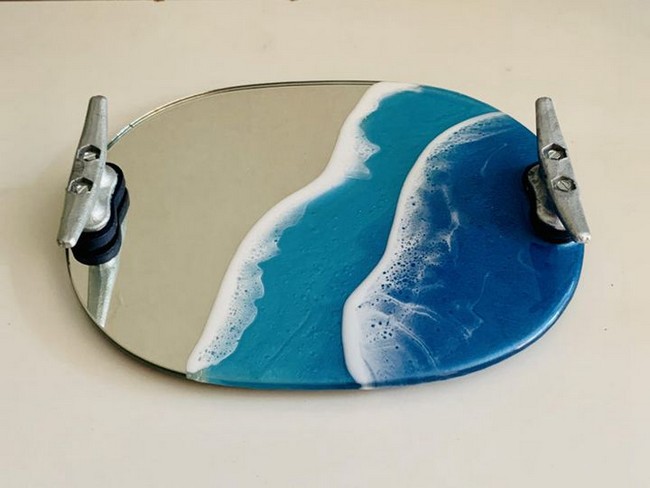
This Resin Ocean Mirror Tray is a stunning piece to display your makeup or decorative accessories. It's easy to make, durable, and sturdy. The concept behind these pieces is you pour the resin into each mold, pour additional layers of resin on top, let them cure overnight, and then peel the mold off before adding another layer of resin. You'll be able to use this tray in any room of your home for a bright pop of color.
Fabulous 3D Flower Resin Tray
This 3D flower resin tray will make any family dinner a little more special. You’ll want to use it on your table daily, and we know you won’t want to put it away for guests. Mix and pour resin on the Mold, and in a small separate cup of resin, add some ghost pearls, glitters, gold flakes, and silver micas, mix them up and pour them near the center of the Mold. This is not quite as easy as our other transfer pieces, but it’s easier than an insert! Make one for yourself today!
Recycled DVD's Mosaic Resin Tray

This beautiful tray is made using recycled CDs, old DVDs, and a little bit of creativity. It is an amazing design idea and will add a touch of class to your table. The recycling process has not only produced artistic crafts but will help you save money as well by turning old CDs into new ones. This project only requires a few supplies like an old CD, some glue, resin, and a little patience, and the results are simply stunning!
Conclusion:
Resin trays are a great way to add some personality to your home. Whether you want to make your candle holders, a creative centerpiece, or display Christmas cards, a DIY resin tray project is perfect for you. This article contains recipes, clear instructions, and plenty of pictures to help you along the way. Dive into this collection of projects now and share some love with your friends by making them a tray. So grab some found material, and let’s get started!