Hair accessories are a great way to add personality to your look and make the most out of your hair. They can also help keep it in check when those hairs are misbehaving. If you’re unsatisfied with a plain headband and looking for something unique and sophisticated, we have gathered some DIY headband ideas you can make from scratch. The best thing about these headbands is you can craft them yourself using materials left over from past projects.
Maybe you have some leftover fabric you don’t know what to make of, or perhaps you have the perfect piece for a new headband but aren’t sure how to go about it. Whether you’re looking for something fun and modern or feminine and romantic, these tutorials will get you through so that you end up with a creative, custom-made piece for any occasion or wardrobe. These DIY headbands will make great additions to your outfits with suitable materials!
DIY Headband Ideas

Making headbands are the best way to transform your dull hair and bring a sparkle to your appearance instantly. Making them is not at all complicated. But, still, many people find it challenging to get creative with this craft idea. This article will help you understand how to make a headband from scratch. Follow these steps, and you will learn how to make DIY headband ideas easily. These DIY headband styles are perfect for those who want to show off their accessories without spending much money. These are the perfect DIY projects if you love to sew or craft!
Uses Of DIY Headbands
Headbands are versatile, easy to make, and extremely cute. They can be used as hair accessories or simply for decorative purposes. Headbands are also perfect for girls who love to wear their hair down! The best thing about headbands is that there are many ways to make them instead of buying them at the store. DIY headbands can be used for so many things — try some of these ideas when your favorite hair accessory gets worn out!
How To Make A Headband

This tutorial teaches you how to make a headband with a simple technique called the Double Fold Over. In this guide, you will learn how to make a one-sided headband and a reversible one, allowing you to turn it out whenever you like. Both are very pretty and can be made in numerous colors and styles, so get ready to head out into the world with a new look on those days when you just want to feel special! The result is a beautiful and professional-looking headband that can be worn in many different ways.
DIY Turban Headband Tutorial
This easy DIY tutorial transforms a piece of fabric into a stunning turban-inspired headband. Perfect for beginners, the process is simple and quick: Simply stitch the edges of your fabric together, then use a stretchy material to wrap around your headband to provide a secure fit. This quick, easy DIY turban tutorial lets you weave a unique headband to tie around your hair in minutes. The best part is that this DIY headband works on long or short hair and is simple enough for kids to try too!
How To Make Headbands

Make your own headbands at home with these three DIY tutorials. All you need is a sewing kit, the fabric of your choice, and the elastic band. First, you'll learn how to make a basic fabric headband using the double-loop overhand knot. Next, you'll create a basic fabric headband from an old t-shirt using the same double-loop overhand knot method. Finally, you'll learn how to make a sailor's knot headband utilizing a cord or rope for added strength within the knot itself. Whether you learn this skill from scratch or want to try something new, you will find it easy and fun to do!
How To Make A Turban Headband
This turban headband tutorial is easy to follow with step-by-step instructions and pictures, so even a beginner can make it. The tutorial is for a regular band, but you can easily customize it to fit any size headband. You can use the same African print or even this as inspiration to create your own custom fabric. You need only two materials: a piece of fabric and an elastic band. Use a sewing machine or your needle and thread for the stitches, depending on how skilled you are at fine needlework.
DIY Scrunchie Headband
You can get an elastic band anywhere, and you probably already have a few old fabric scraps in your sewing kit or home décor stash that could be repurposed into a headband—so why not make one? Use an elastic band that is ¾" wide and 6" long, and some fabric pieces cut out of 2" wide strips starting at 14" long and ending with strips at 40" long. Tie the long strips onto both ends of the shorter ones to create an extra-thick band. The final step is to stitch them on when you feel it’s necessary. The best part? This DIY scrunchie can be updated any time you like, simply by replacing your fabric!
DIY Headband With Button For Face Mask

We've created this easy DIY headband with a button design to keep you comfortable and fashionable in the days ahead. Use your creativity to choose between a number of colorful button options, and get creative on how you'd like to match those buttons with your outfits! We have also made it through COVID-19 safety precautions, so you know this is a great design for a significant time. This simple design serves both functional and aesthetic values. Follow this tutorial and create your own headband with the button for a mask to keep your face covered.
DIY Scrunchies Headband
For a beautiful DIY white scrunchies headband, linen is the fabric of choice. Silk and satin are other options if you want to create a headband in your favorite color. In the instructions, we use a basic headband, and the tools and materials required are thread and needle, scissors, just about any kind of fabric or material, and a pair of hands. It’s an excellent project for beginner sewers! The materials are easy to find and inexpensive, and you can make them with just a primary sewing machine.
How To Knit A Headband With Twist
Using a light worsted yarn and needles in size 3.5mm (US4/UK9), knit this simple headband that can be worn on the right or left side of your head, depending on how you want it to look. These instructions are for an adult head size 56-58cm, but by adding or subtracting stitches, you can adjust the fit to suit anyone who wants to wear it. The pattern uses the English rib technique, but an alternative stitch is given if you don’t want to knit in that style. The yarn you select is up to you, but you can use anything from thick novelty yarns to thin lace-weight cotton.
You can also see: DIY Bow Holder Ideas
DIY Elastic Headband Idea

Create a headband in your favorite color. This project is an excellent idea for beginner sewers, but it is also a friendly, quick, and easy project for those with experience. The options are endless with this versatile DIY headband. You'll need fabric, 6" of elastic, matching thread, safety pins, scissors, needles, and pins. The headband is relatively straightforward, and once you've made the first one, the others can be sewn up quickly - perfect for gifts!
Knotted Headband Tutorial

Creating knotted headbands is a simple and inexpensive craft to add to your wardrobe, much like a hat. The headband can be tied in different ways to match any outfit or mood, especially useful for formal events. This DIY Knotted Headband Tutorial shows you how to make a basic yet elegant chiffon-tied knot with two colors in under five minutes. This headband can be used as an accessory for any age bracket and does not require elastic or any other hardware material.
DIY Knot Headband
This knotted headband is an easy and fun craft you can make with your kids. It’s a great way to use up some of those fabric scraps you may have lying around or those left over from a project that didn’t turn out the way you had hoped. This craft is perfect for photos, dress-up days, or fun. This DIY knot headband can be made in a short amount of time, and it’s super cute! You can make a lot in good time. It requires minimal fabric and a basic headband, making it the perfect headband for family photos or events.
Padded Headband Idea

This tutorial will show you how to make your own padded headband with a plastic headband and upholstery foam. With the right supplies and minimal sewing skills, you'll make a fashionable accessory great for everyday wear. Using the measurements or paper template as a guide, sew the fabric pieces together and then glue your top and bottom padding together. Use this simple construction method to build these headbands from scratch, or use the finished product as a guide for future projects.
DIY Headband Out Of T-Shirt
Do you have a bunch of old t-shirts stashed away in the corner or just slightly out of shape? We've got a great DIY project for you to turn these into a headband. All you need is an old t-shirt and some scissors. Cut out your fabric from the t-shirt and tie it up like these in the video using superficial knots. The best part is that this can be adjusted according to how tight or loose it fits around your head. This DIY headband is an easy and fun project requiring only a few steps. They can be worn in any way you choose, or make one for each of your favorite colors!
How To Sew An Elastic Headband
When you get dressed for your day, do you wish you had something to keep your hair out of the way? A bright and colorful fabric headband is a great solution. This DIY project is quick and easy to make to create fun elastic headbands for yourself or as a gift for a friend. All the supplies needed are lying around the house, making this project practically free. We use our sewing machine to sew this headband up, but you can use a needle and thread if you prefer.
Fitness Headband Tutorial

You can make this DIY workout headband with simple steps to keep your hair off your face while exercising. For this tutorial, you will need slightly elastic fabric, scissors, a needle, pins, and thread. This easy-to-follow tutorial will help you create your own custom-designed headband with simple techniques that allow you to use any fabric you love—whether it's a vintage T-shirt or an old pair of jeans. Once complete, you'll have your own fashion statement to complete any workout look!
DIY Baby Headband
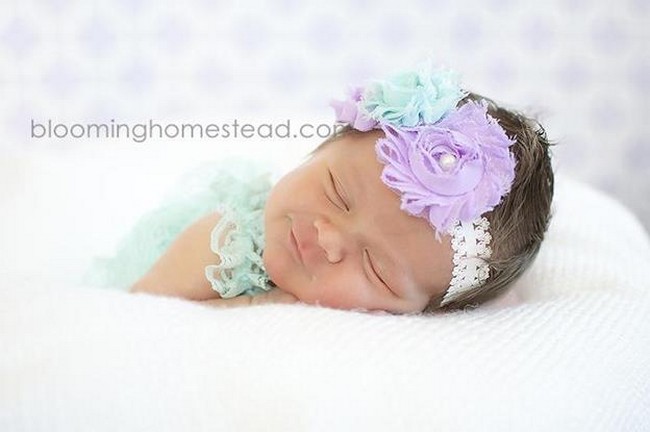
DIY Baby Headband is the ideal present for any newborn or young child. Photo props are always welcome at baby's first birthday parties, family gatherings, and more. Made with a stretch fabric that cups around the head and ties in the back so you can adjust it to fit precisely where you need it. It includes all sizes, from newborns to 2-year-olds, so it's an excellent gift for friends with babies of all ages. With a few simple measurements and basic knitting skills, even beginners can make this sweet gift that will be treasured for years to come.
DIY Headband In 10 Minutes

Making a headband is easy. You only need a piece of fabric and basic sewing skills to complete this DIY project. It won’t cost more than $1 and will be done in 10 minutes. You don’t need to be a sewing expert to create this simple DIY Headband in 10 minutes. All you will need is a half-yard fabric and the basics of sewing skills, which is much easier than you can imagine. So, get ready to make your own fashionable Headband and experience the joy of creating something new from old material.
DIY Simple Headbands

Stay stylish with these DIY simple headbands. Featuring a wide selection of styles, each is lovingly crafted to suit every level of fashionista. These beautiful accessories are fast, easy, and cheap to create, making them perfect for meeting your daily needs and available in various colors. Choose between a stretch band or simple elastic band design to find the perfect look for you. If you want to create a more dramatic look or use just one for a simple touch, this design allows wearing more than one to create a more dramatic look or use just one for a simple touch.
How To Sew A Headband
This video shows you how to make a stretchy headband with your sewing machine. The same method can be used to sew scrunchies and infinity scarves. The size of your headband determines the fabric strip length. In choosing a size, know that your final headband will be half the size of your fabric, plus or minus 1 inch. Sew one end closed first and then sew the other closed, ensuring that the stretchy material is aligned throughout this process. Clip the skirt, so there is an opening at both ends; pull it through the opening at one end, tying both ends together in a knot. Your headband is now complete!

Discover Other DIY Projects: